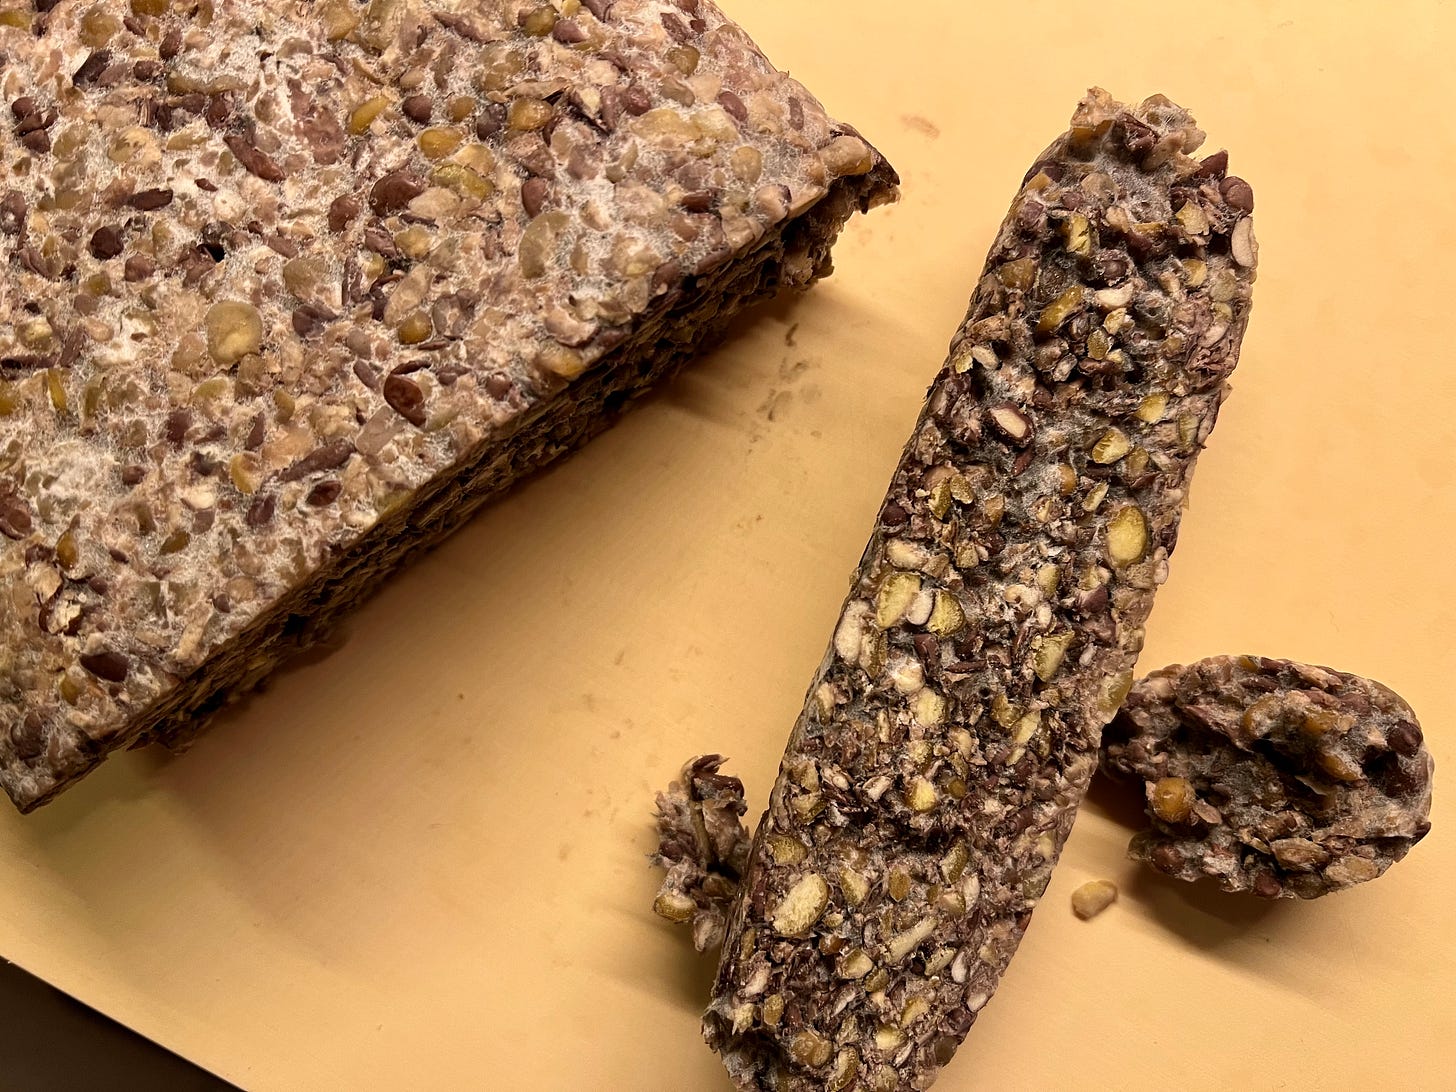
Making tempeh is not difficult, but it does require attention. Personally, I’ve always found it difficult to give my attention to things that require it in short bursts over long periods of time. I’m more about pets and cooking than plants and fermentation. I love tempeh though, and it’s hard to find fresh in the city. So I’m learning.
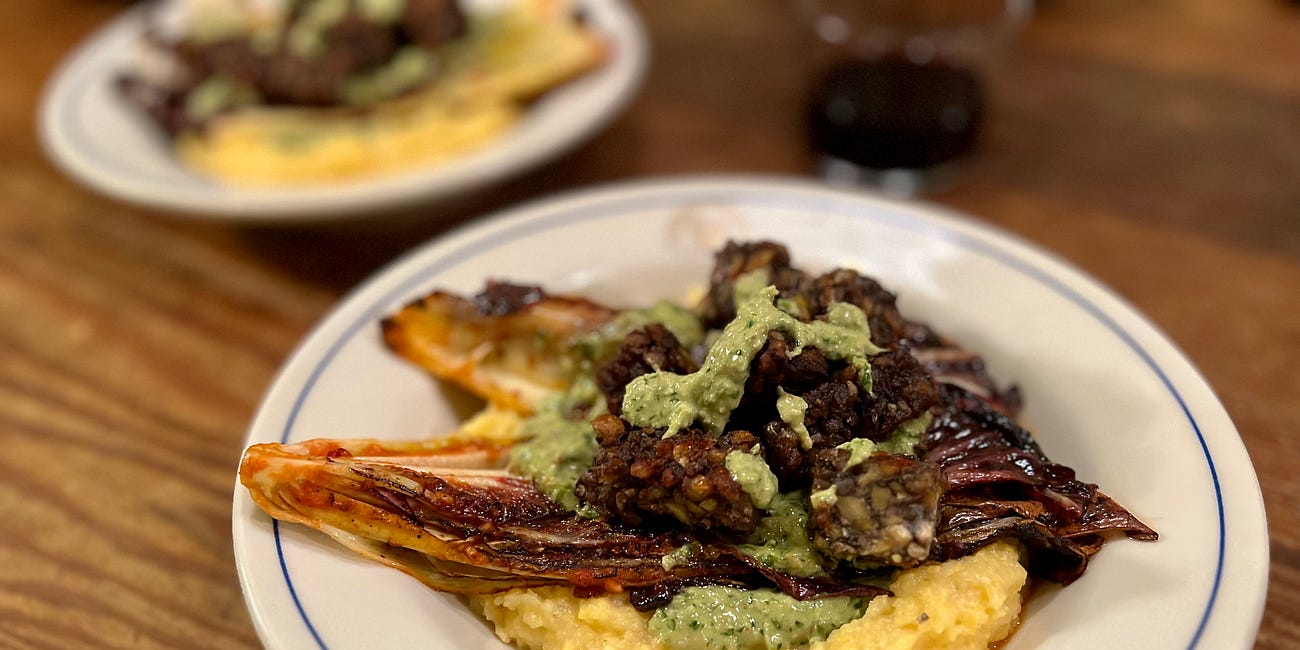
Last Saturday, Barry Schwartz taught a tempeh-making workshop at Bronx River Alliance, and sent us each home with 2 lbs of beans and the most valuable gift: a tiny dime-bag of his tempeh culture. With nothing more than the oven in my kitchen and a probe-thermometer and a little forced patience, I successfully fermented the tempeh and made us a beautiful dinner on Friday night, of charred radicchio with crispy tempeh and toasted walnut salsa verde. You could make that dish with the tempeh you find in the supermarket (usually the Lightlife brand) but I promise it won’t be anything like what we ate. Mass-produced, refrigerated tempeh is always pasteurized, and it has nothing of the nuttiness or funkiness or taste of fresh tempeh.
Charred Radicchio with Crispy Tempeh and Walnut-Parsley Sauce
I stayed up too late the other night thinking about how to eat tempeh. Fresh tempeh (as in not pasteurized) has a nutty taste, and the most wonderful crunchy, crumbly texture when cooked on the stove or oven in plenty of fat. I liked the idea of serving it in a dish where its taste and texture could stand out, rather than burying it in a stew or a sweet…
So, even if you’re not a fermentation person, scroll down and give a thought to the idea of making tempeh yourself. I’ve summarized everything Barry taught us in his workshop, and added some of my own notes and observations from going through the process myself.
What is Tempeh?
Tempeh is a 2500 year old food from Indonesia. Traditionally, it’s made from soybeans fermented with the fungus Rhizopus oligosporus. It looks like a thick brick of beans with fuzzy white stuff in the cracks — that’s the mycelium (occasionally there are black splotches, but that’s just where it’s sporulated and isn’t harmful). It’s highly nutritious, because the fermentation process makes the protein, fiber, and vitamins in the beans more bio-available. It’s one of the few sources of B12 for vegans and has all nine essential amino acids.
It was introduced to the United States in the 1960s via an Indonesian microbiologist who came to Cornell, and then took off among hippy and back-to-the-land vegetarians with the help of the commune The Farm in Tennessee (which is where Barry still gets his starter). Though it’s more nutritious and digestible than tofu, it never got as popular, possibly because of its shelf-life or because tofu-oriented cuisines like Chinese and Japanese are more ubiquitous. Or maybe because people feel weird about eating fungus.
Preparing the Beans
In order for the fungus to penetrate the beans, they need to be broken up, hulled, and cooked until they’re just al dente — too hard and the culture can’t penetrate, but too mushy and there won’t be those spaces in between the beans for the mycelium to grow. Then they need to be almost completely dried, because if they’re wet the culture won’t spread. Barry uses a hairdryer for that step, but I used my oven.
Although soy is traditional for tempeh (and Barry insists that it tastes the best), chana dal is good starter bean. It can be easier to find than soybeans, and the tedious work of splitting and hulling has already been done for you.
To prepare chana dal for tempeh, you can soak them ahead of time (this reduces cooking time and starts the fermentation process) or just go straight to cooking. I’d recommend cooking them on the stove, because then you can taste every now and then to check for firmness. It should only take about 8-12 minutes on the stove, or 4 minutes at low pressure in an Instapot.
Once they’re cooked, spread them out on a baking sheet or two and dry them using a hair dryer or in your oven with the lowest setting of heat (at 170°F, mine took about 2.5 hours, stirring the beans and switching the trays a couple times throughout). When they’re damp, but no longer wet, they’re ready.
Fermenting the Beans
As Barry explains it, the way to ferment the beans is to recreate the climate of Indonesia. They would probably be wrapped in banana leaves and left out, but if you don’t live in a tropical place, you can use your oven and some plastic sandwich bags.
You’ll need tempeh culture to ferment your beans. I’ve bought mine from Cultures for Health in the past, but Barry insists that what he uses is better. His culture comes from The Farm, which I only knew about because of its famous midwife, Ina May Gaskin. Anyway, Barry really just wants more people to make tempeh, so if you want some culture from him, I can probably help broker this exchange.
Fungus needs plenty of oxygen to grow, so first make a bunch of tiny holes in 2 Ziploc sandwich bags (the 6 ½” x 5 ⅞” ones — each of these bags will hold 1 lb of beans). Barry uses an evil-looking tool for removing wallpaper, but you can use a needle, laying the bags on a folded towel and poking all the way through.
Make sure the beans aren’t too hot anymore, then add them all into a big bowl. Measure out your tempeh culture — Barry says that 1 gram of culture will ferment 10 lbs of beans, but it’s okay to use more culture than is necessary. I used 0.3 grams of culture for 2 lbs of beans, and measured with a highly precise scale. You can also just use ⅛ of a teaspoon, which is about 0.35 grams. In order to distribute such a small quantity of culture evenly over the beans, mix it with a little bit of flour, which will increase the volume.
Mix the beans and culture together very well, and then pack them tightly into the perforated bags.
Turn on your oven light and place the bags in the middle rack, then close the oven door. After 12 hours, check the temperature in the middle of the beans using a probe thermometer. The metabolic activity from the growing fungus will start generating its own heat, so you might need to cool down the tempeh. If the temperature is around 83°F, then you can probably leave the blocks in the oven but turn off the light (if it’s lower, keep the light on). Make sure the center of the block never goes above 94°F so it doesn’t kill the culture.
For the next 24-36 hours, check the temperature every so often to make sure the tempeh isn’t overheating. I moved my tempeh out of the oven, and then to a spot in front of a cold window when it really started to heat up. Wherever you move it, keep it on a cooling rack so that air can move freely around it.

How to know it’s Done
It takes about 36-48 hours for the tempeh to ferment. The block will feel solid, with all the spaces filled in with white mycelium, and it will smell kind’ve funky but not sour or unpleasant.
Put the tempeh in your fridge if you’ll be cooking it within 3-4 days. (It will continue to slowly ferment in the fridge, and could over-ferment and taste bitter if you don’t eat it soon enough.) Put it in the freezer to store longer (Barry says “indefinitely,” but I find that things in my freezer take on the odor of other foods, so I’d try to eat it within 3-4 months.)
Directions for Making Chickpea Tempeh
It’s a good idea to read everything above so that you know what’s happening at each step of the process, but here’s a distilled step-by-step guide to making tempeh with chana dal.
Ingredients and Tools
2 lbs chana dal, preferably soaked for 1 hour
0.2 grams Barry’s tempeh culture, or 1 packet culture from Cultures for Health
½ teaspoon flour (if using Barry’s tempeh)
Pot or Instapot for cooking beans
Colander for draining beans
Large bowl for drying and mixing beans
Hair dryer (or use your oven)
Sheet trays for drying beans (if using oven)
2 Ziploc sandwich bags (6 ½” x 5 ⅞”), perforated all over with needle-sized holes 1-cm apart
Probe thermometer
Cooling rack
Total time: About 40-52 hours, or 36-48 hours after cooking and drying the beans
Method
Whether or not you soaked the chana dal, rinse it well, then put it in a pot with plenty of water and cook until al-dente (about 8-12 minutes after the water boils). Alternatively, cook in an Instapot for 4 minutes at low pressure.
Dry the beans: If using a hair-dryer, put the beans in a large bowl and dry until there’s no water at the bottom. If using an oven, spread the beans out on two sheet trays, and bake 2-3 hours at 170°F, mixing several times throughout. They can be damp but not wet enough to stick together, and cool or just slightly warm to the touch. Put the beans in a big bowl.
Measure the culture, and mix it with ½ teaspoon flour to increase the volume (or just use the Cultures for Health packet). Sprinkle the culture all over the beans and mix well to combine.
Pack the beans into the two perforated Ziploc bags (they should just barely fit).
Place the bags in the middle rack of your oven and turn on the oven light. Leave for 12 hours.
Check the temperature at the center of the beans using a probe thermometer. The ideal temperature is 87°F and the highest it can go without killing the culture is 94°F. Either leave the bags in the oven with the light on, turn the light off, or remove them from the oven to control the temperature. Keep them on a cooling rack.
For the next 24-36 hours, continue monitoring the tempeh’s internal temperature to make sure it’s fermenting without overheating. Use a fan or cool window if necessary.
When the block is firm and mycelium is visible in all the cracks, it’s ready. Store in the fridge for 3-4 days or in the freezer indefinitely.


Thanks you for the directions, I have been toying with the idea for quite some time now.
Is there a way to make this a continous process like e.g. sourdough or does one need new, fresh spores every time?
Thanks Charlotte